Struggling with parts that just won’t fit together easily during assembly? Misalignments causing delays and frustration? Designing self-aligning components can make your life much simpler.
Self-aligning components use features like chamfers, tapers, or keyways to naturally guide parts into their correct positions. This greatly reduces assembly time, minimizes errors, and often lowers the skill required for the assembly process.
Thinking about how parts come together is a big part of good design. It’s something I’ve learned over many years, first in the CNC shop and then helping clients globally. When you design parts that guide themselves into place, you’re not just making assembly easier; you’re making the whole manufacturing process more efficient. Let’s explore how these smart design choices can really benefit your projects, especially when you’re working with tight tolerances like our engineer friend Alex often does. These principles are key whether you’re a startup or a big OEM.
Why Are Self-Aligning Features So Crucial in Modern Manufacturing?
Tired of assembly taking too long? Are misaligned parts forcing you to do costly rework? Self-aligning design features are a straightforward solution to these common problems.
Self-aligning features are vital in modern manufacturing because they significantly cut down assembly time, lower labor costs, reduce the chance of assembly errors, and ultimately boost overall product quality and reliability.
| In my experience at QuickCNCs, I’ve seen firsthand the difference self-aligning features make. When we machine parts for clients like Alex, who works on high-precision robotics, ease of assembly is a major concern. He needs parts that fit perfectly every time, especially when dealing with tolerances of ±0.01mm. Self-aligning features help achieve this. They reduce the need for highly skilled assemblers because the parts themselves do a lot of the work. This means faster assembly lines and fewer mistakes. Fewer mistakes mean less scrap and rework, which directly translates to cost savings. For Alex, this also means meeting tight project deadlines without compromising the integrity of his robotic systems. Think about it: if a robotic arm component is even slightly misaligned, it can affect the robot’s performance and lifespan. So, these features aren’t just about convenience; they’re about quality and reliability. We often discuss these aspects with clients during the DFM (Design for Manufacturability) stage to optimize their designs. | Aspect | Without Self-Aligning Features | With Self-Aligning Features |
|---|---|---|---|
| Assembly Time | High | Low | |
| Labor Cost | Higher | Lower | |
| Error Rate | Increased | Reduced | |
| Skill Required | Higher | Lower | |
| Product Quality | Potentially compromised | Improved |
What Are the Most Common Types of Self-Aligning Features You Can Design?
Are you unsure how to make your parts fit together smoothly? Do the different alignment methods seem confusing? Understanding the common types of self-aligning features can really help.
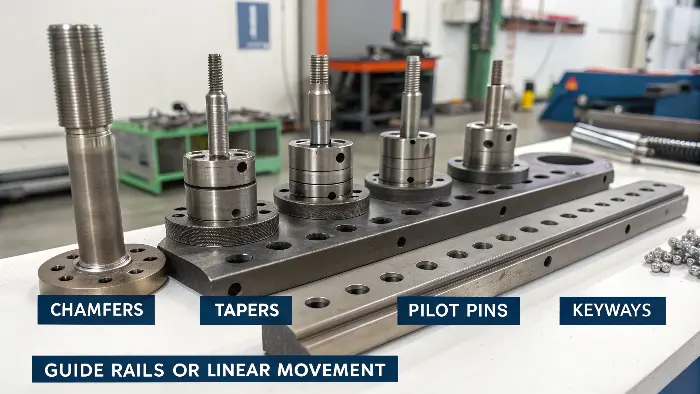
Common self-aligning features include chamfers and tapers for initial guidance, pilot pins and holes for precise location, D-shafts and keyways for rotational alignment, and guide rails or slots for linear movement.

Let’s break these down a bit. I see these features all the time in the designs we machine at QuickCNCs.
Chamfers and Tapers: These are probably the simplest. A chamfer is just an angled edge, and a taper is a gradual decrease in diameter or width. They act like funnels, guiding one part into another. For example, a slight taper on the end of a pin makes it much easier to insert into a hole.
Pilot Pins and Holes (or Bosses and Recesses): These provide more precise location. One part has a pin (or a raised area called a boss), and the mating part has a hole (or a recess). Once the pin starts to enter the hole, the parts are constrained in two dimensions. These are great for aligning stacked components.
D-shafts and Keyways: These are excellent for preventing rotation. A D-shaft has one flat side, which fits into a D-shaped hole. A keyway is a slot in a shaft and a corresponding slot in a hub, with a small piece called a key fitting into both. Alex might use these for motor shafts connecting to gears in his robots to ensure power transmits correctly.
Guide Rails and Slots: These are used when you need to align parts that slide relative to each other. Think of a drawer sliding into a cabinet. The rails and slots keep the movement linear and prevent jamming.
Each of these has its place. The choice depends on what you’re trying to achieve with the alignment.
How Do You Choose the Right Self-Aligning Feature for Your Application?
Feeling overwhelmed by the different choices for alignment features? Worried you might pick one that isn’t quite right for your design or adds unnecessary cost? A clear thought process helps.
To choose the right self-aligning feature, consider the assembly direction, the level of precision needed, load conditions the feature will experience, available space, and the manufacturing cost of the feature.

When I work with engineers like Alex, we often discuss these factors. For example, if he’s designing a housing for a robotic joint, he needs very precise alignment.
First, think about the degrees of freedom you need to control. Do parts just need to be guided in, or do they need to be fixed in a very specific orientation?
Then, consider the loads and stresses. A small chamfer might be fine for initial guidance, but if the feature also needs to bear a load, it needs to be strong enough. For instance, a pilot pin used for alignment might shear off if it’s also subjected to unexpected forces.
Tolerances are critical. For high-precision assemblies like Alex’s robotic components (±0.01mm), you might need tighter-fitting pilot pins or more accurately machined tapers. Looser tolerances might be acceptable for less critical alignments, which can reduce manufacturing costs.
Material compatibility is also important. If parts are made of soft materials, the aligning features might wear out quickly.
And, of course, manufacturing complexity and cost play a big role. A simple chamfer is easy to machine. A complex, organic-shaped guiding feature might be expensive. At QuickCNCs, we always try to find the balance between perfect function and practical machinability. We want to help clients get the best performance without overspending.
What Are Key Design Considerations When Implementing Self-Aligning Features?
Have you designed a self-aligning feature, but it’s not working as smoothly as you hoped? Are you encountering unexpected binding or difficulty during assembly? The details in your design really matter.
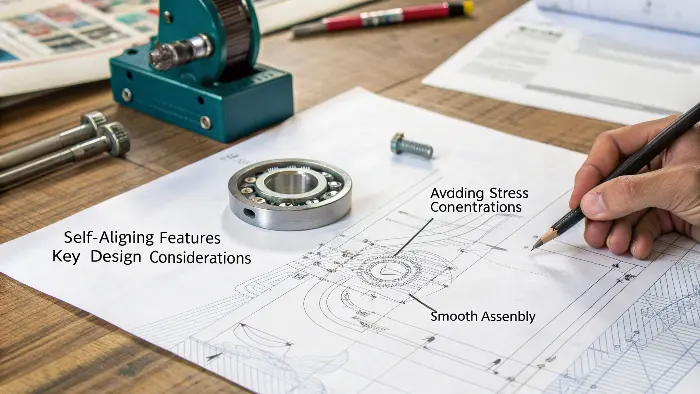
Key design considerations for self-aligning features include providing generous lead-ins, ensuring appropriate clearances, choosing materials for wear resistance, and making sure the features don’t create stress concentrations.

Let’s dive into these points. I’ve seen many designs over the years, and these details often make the difference between a frustrating assembly and a smooth one.
Generous Lead-ins: This means making your chamfers and tapers prominent enough. If a chamfer is too small, it won’t do much to guide the part. The angle of the lead-in is also important. Too steep, and it might not guide properly; too shallow, and it might take up too much space.
Appropriate Clearances and Tolerances: You need enough clearance for parts to come together without force, but not so much that they are sloppy. This is where careful tolerance stack-up analysis comes in, especially for precision parts like those Alex designs. We work closely with clients to ensure CNC machining tolerances align with their assembly needs.
Material Choice: The material of the aligning features should be able to withstand repeated use without deforming or wearing excessively. If one part is much harder than another, the softer part’s alignment features might get damaged. Sometimes, using an insert of a harder material for the feature itself is a good solution.
Strength and Stress Concentrations: Alignment features, especially sharp corners in keyways or small pins, can sometimes become points where stress concentrates. This can lead to failure under load. Using fillets and radiuses can help distribute stress.
Ease of Manufacturing: Always think about how the feature will be made. A feature that is easy to design in CAD might be difficult or expensive to machine. This is a constant conversation at QuickCNCs – how to achieve the design intent efficiently. I recall a project where a client designed very deep, narrow guide slots. While functional, they were challenging to machine accurately, increasing the cost. We worked with them to find a slightly modified design that was easier to produce while still meeting their alignment needs.
Conclusion
Incorporating self-aligning features into your component designs makes assembly much simpler. It also helps cut costs, reduce errors, and ultimately improves the quality of your final product.
