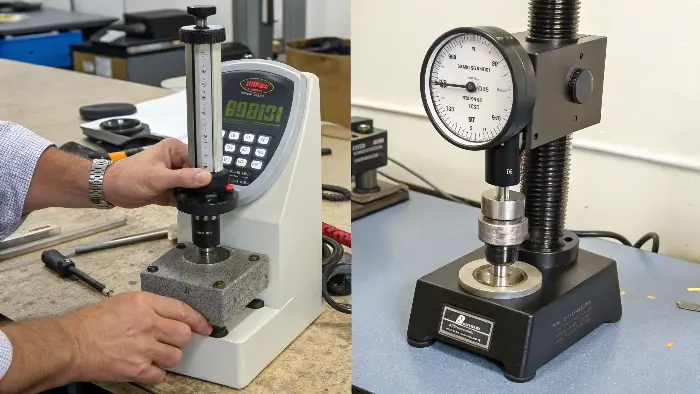
Confused by different hardness tests? Choosing the wrong one can give you misleading data for your engineering project. I’m here to make these methods clear.
Metal hardness tests measure a material’s resistance to permanent indentation. Key methods include Rockwell, Brinell, and Vickers, each suited for different materials and applications based on indenter type and load.
Understanding metal hardness is vital. It tells us so much about a material’s strength, wear resistance, and even its machinability. As an engineer like Alex, who designs high-tolerance parts, getting accurate hardness data is non-negotiable. But with names like Rockwell, Brinell, and Vickers, it can get confusing. I’ve been working with these tests for years, both in the shop and helping clients specify them. Let’s explore these common methods so you can choose the right one with confidence for your critical components.
What Are the Main Methods of Hardness Testing?
So many tests out there! Which ones are truly important for metals? Let’s focus on the industry standards you’ll encounter most often.
The three main hardness testing methods for metals are Rockwell, Brinell, and Vickers. Each uses a distinct indenter and load application, offering unique advantages for different material types and thicknesses.
When we talk about characterizing metals, these three methods are the workhorses. I’ve seen them used countless times in material specification sheets and quality control reports. Each one has its place.
- Rockwell Hardness Test: This is probably the most widely used method in the US. It’s fast and gives a direct reading. The test measures the depth of penetration of an indenter under a large load compared to the penetration made by a preload. There are different scales (like HRC for hard steels, HRB for softer materials) using different indenters (diamond cone or steel ball) and loads. It’s great for quick checks on heat-treated parts, something Alex would find useful for his robotic components.
- Brinell Hardness Test: This method uses a relatively large spherical indenter (typically a 10 mm diameter hardened steel or tungsten carbide ball) and a high load. After the load is removed, you measure the diameter of the indentation. The Brinell Hardness Number (HB or HBW) is calculated from the load and the area of the indentation. It’s good for materials with coarse or inhomogeneous grain structures, like castings, because it averages the hardness over a larger area.
- Vickers Hardness Test (HV): This method uses a square-based diamond pyramid indenter. Like Brinell, you measure the size of the indentation (the diagonals) after the load is removed. Vickers is very versatile. It can be used for very soft to very hard materials and is suitable for small or thin specimens. The hardness value is consistent across its range.
While there are other specialized tests like Knoop (often for brittle materials or thin coatings), these three cover the vast majority of metal hardness testing needs. Understanding their basic principles is key.What Is the Difference Between Rockwell and Brinell Hardness Methods?
Rockwell or Brinell? They sound similar, but they are not interchangeable. Using the wrong one for your material or application can lead to inaccurate results.
Rockwell measures indentation depth directly using a minor then major load, giving a quick numerical output. Brinell uses a larger ball indenter, and hardness is calculated from the indentation’s diameter.

Let’s dive a bit deeper into Rockwell and Brinell. They are both incredibly useful, but they work differently and are suited for different situations. I’ve seen engineers like Alex need both, depending on the component and material.
Rockwell Hardness Test:- Principle: Measures the difference in penetration depth from a minor load to a major load.
- Indenters & Scales: Various scales exist. Common ones include:
- HRC (Rockwell C): Diamond cone indenter, 150 kgf major load. Used for hard steels, treated steels.
- HRB (Rockwell B): 1/16" steel ball indenter, 100 kgf major load. Used for softer steels, aluminum alloys, copper alloys.
- Many other scales (HRA, HRD, HRF, etc.) exist for different materials.
- Output: Direct reading on a dial or digital display. No calculation needed by the operator.
- Advantages: Fast, easy to perform, less operator influence, non-destructive for many parts (small indentation). Excellent for quality control and high-volume testing.
- Considerations: Surface finish can affect readings. Not ideal for very thin materials where the indentation might go through or be affected by the supporting anvil.
Brinell Hardness Test: - Principle: Measures the diameter of an indentation made by a hardened steel or tungsten carbide ball under a specific load (e.g., 3000 kgf for steels, 500 kgf for softer metals) held for a set time (e.g., 10-15 seconds).
- Indenter: Typically a 10 mm diameter ball, but 5 mm or 2.5 mm balls can be used with adjusted loads for thinner or softer materials.
- Output: Brinell Hardness Number (HBW for tungsten carbide ball, HB for steel ball) is calculated using a formula involving the load and the measured diameter of the indentation. This usually requires an optical measuring device.
- Advantages: The large indentation averages out local inconsistencies in heterogeneous materials (like cast iron). Good for bulk material assessment. The test conditions (F/D² ratio) can be adjusted for different materials.
- Considerations: Slower than Rockwell. Leaves a larger indentation, so it might not be suitable for finished parts or thin specimens. Not ideal for very hard materials where the indenter itself might deform.
I always tell my clients: if you need a quick check on a batch of heat-treated steel parts for consistency, Rockwell is your friend. If you’re evaluating a large forging or casting for its overall bulk hardness, Brinell often gives a more representative value. Alex, needing precision parts, would likely rely heavily on Rockwell for final checks, but Brinell might be used by his material suppliers for certifying raw stock.What Is the Difference Between HRC and Brinell Hardness?
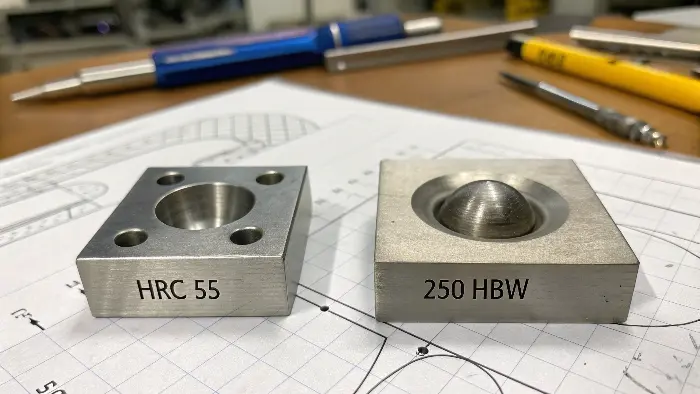
You see "HRC 55" or "250 HBW" on a drawing. Are these related? Understanding the difference between specific scales like HRC and the general Brinell value is crucial for accurate material specification.
HRC is a specific Rockwell scale (C) using a diamond cone for hard materials. Brinell (HBW) uses a ball indenter, typically for softer to medium-hard metals, and measures indentation diameter. They aren’t directly interchangeable.

It’s easy to get confused between a specific scale like HRC (Rockwell C) and the Brinell hardness value (HBW). They both measure hardness, but they do it in fundamentally different ways and are suited for different ranges of material hardness.
HRC (Rockwell C Scale): - Indenter: Diamond cone (Spheroconical Brale indenter).
- Load: 10 kgf minor load, 150 kgf major load.
- Measurement: Depth of penetration.
- Typical Application: Hardened steels, hard cast irons, deep case-hardened steels, and other materials harder than about 100 HRB. The typical range for HRC is about 20 to 70. Below HRC 20, other Rockwell scales (like HRB) or Brinell are often more accurate. Above HRC 70, the material is extremely hard, and the diamond indenter itself might be at risk, or the indentation is too shallow for accurate measurement.
Brinell Hardness (HBW): - Indenter: Tungsten carbide ball (typically 10mm, but other sizes can be used). The "W" in HBW denotes a tungsten carbide ball, which is preferred over a steel ball (HB or HBS) for harder materials to prevent indenter deformation.
- Load: Varies depending on the material, but commonly 3000 kgf for steels and cast irons, 500 kgf for copper and aluminum alloys. The F/D² ratio (Load/Diameter²) is kept constant for similar materials.
- Measurement: Diameter of the indentation.
- Typical Application: Softer to medium-hard metals like aluminum, copper, brasses, softer steels, and cast irons. It gives a good average for materials that aren’t perfectly uniform.
The key takeaway is that HRC is for harder materials, and the result is based on depth. Brinell is often for softer to medium materials (though it can go quite high with a tungsten carbide ball), and the result is based on the diameter of a larger indent. Conversion charts exist between HRC and HBW for specific materials like steel. However, these are approximate. I always caution engineers like Alex: if a specific hardness scale and value are critical, test using that exact scale. Conversions can introduce errors. For example, a part specified as HRC 58-62 needs to be tested on the Rockwell C scale. Testing it on Brinell and then converting might not give the precise assurance needed for a high-tolerance robotic joint.What Is the Difference Between Rockwell Hardness and Durometer?
You might hear "Durometer" for plastics or rubbers. Is this similar to Rockwell for metals? Using the wrong test for your material type will give you completely meaningless numbers.
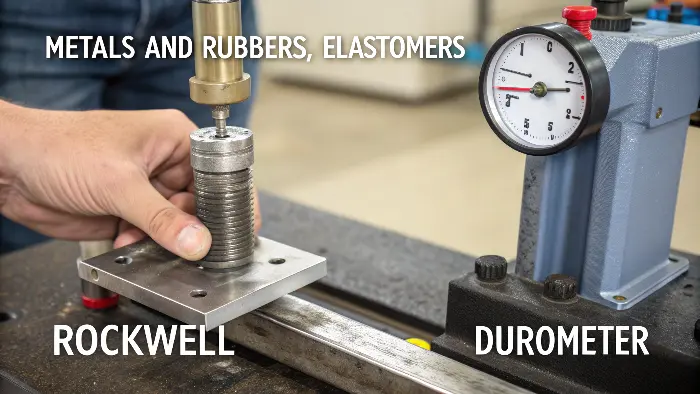
Rockwell hardness tests are for metals, measuring permanent indentation. Durometer (Shore hardness) is for polymers, rubbers, and elastomers, measuring elastic indentation depth against spring force.

This is a common point of confusion, especially when projects involve both metallic and non-metallic components. Rockwell and Durometer both measure "hardness," but they are designed for fundamentally different types of materials and measure different responses.
Rockwell Hardness (for Metals): - As we’ve discussed, Rockwell tests (HRC, HRB, etc.) involve pressing a hard indenter (diamond or steel ball) into a metal surface with a significant force.
- It measures the permanent plastic deformation – the dent left behind.
- The scales and loads are designed for the rigidity and strength of metals.
Durometer Hardness (Shore Hardness – for Polymers & Elastomers): - Principle: Measures the resistance of a material to indentation by a spring-loaded indenter. It’s more about the material’s elasticity or ability to "spring back."
- Indenters & Scales:
- Shore A: Used for softer elastomers, rubbers, and flexible plastics. Has a blunter indenter.
- Shore D: Used for harder rubbers, rigid plastics, and semi-rigid plastics. Has a sharper indenter.
- Other Shore scales (OO, O, B, C, DO, M) exist for very soft to extremely hard non-metallic materials.
- Output: A dimensionless number from 0 to 100. A higher number means a harder material.
- How it works: The indenter is pressed into the material, and the depth of penetration against the spring force determines the reading. The material largely recovers its shape after the indenter is removed.
The core difference lies in plastic vs. elastic deformation. Metals tested with Rockwell permanently deform. Polymers tested with a Durometer mostly deform elastically. You simply cannot use a Durometer on metal and expect a meaningful result, nor can you use a Rockwell tester (with its high loads) on a soft rubber – you’d just punch right through it!
For someone like Alex, who primarily designs metal parts, Rockwell is his go-to. However, if his robotic systems include plastic housings, rubber seals, or shock absorbers, he’d need to specify Durometer hardness (e.g., Shore A 70 for a seal, Shore D 80 for a rigid plastic casing). I’ve seen specifications call for "Rockwell D hardness" for a plastic part – this is incorrect and shows a misunderstanding. It should be "Shore D". Clear communication of the correct test method is vital.Conclusion
Choosing the right hardness test—Rockwell, Brinell, Vickers, or even Durometer for non-metals—ensures accurate material data, leading to reliable and successful engineering projects.
