
Are you tired of getting CNC parts that fail under stress? Picking the wrong options wastes your time and ruins your budget. I will show you exactly how to pick the right parts for your projects every single time.
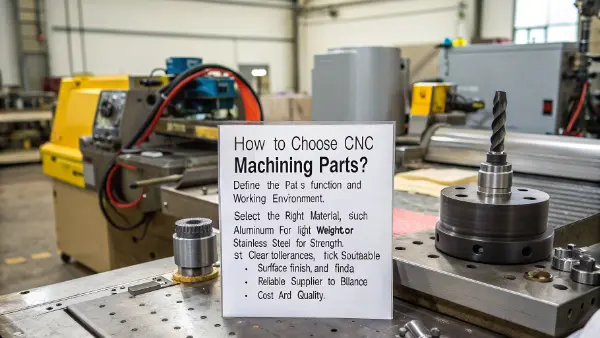
To choose CNC machining parts, you must first define the part’s function and working environment. Next, select the right material, such as aluminum for light weight or stainless steel for strength. Finally, set clear tolerances, pick a suitable surface finish, and find a reliable supplier to balance your cost and quality.
Let us break down the exact steps to get this right. If you miss even one of these details, your entire project could face huge delays.
How does the part function and environment affect your material choice?
Does your part crack when it gets hot? Using standard materials in harsh places is a big mistake that ruins machines. You must match your material to the real world to stop parts from breaking.
Your part’s job and environment dictate the best material to use. You must check if the part faces high heat, harsh chemicals, or heavy wear. For general use, aluminum is great. If it faces extreme heat or chemicals, you should pick tougher materials like stainless steel or PEEK.
I see many engineers make a basic error. They just pick standard aluminum for every single job. I remember a client from Germany a few years ago. He designed a great robotic arm. But he used standard plastic for a joint part. The part melted a bit near the hot motor. The whole robot stopped working instantly. I had to step in and help him fix this.
Match the material to the exact job
You have to define the job first. What does the part actually do all day? You must think about the load it carries. You must think about the stress it takes. If the part holds heavy weights, you need a strong metal. If it needs to be very light, you should look at special plastics or light metal alloys. Material choice decides the true life of the part. If you pick weak metal, the part will bend and break soon.
Think about the world around the part
Environmental factors change everything in your choice. Temperature is a huge factor. Chemical exposure is another big one. If your part goes outside, it will face heavy rain and hot sun. It might need to resist deep rust. Food and medical jobs have their own strict rules.
Simple Material Guide
| Material Type | Best For | Things to Watch Out For |
|---|---|---|
| Aluminum 6061 | Light weight, general use | Not good for extreme heat |
| Stainless Steel | High strength, no rust | Hard to machine, costs more |
| PEEK Plastic | High heat, harsh chemicals | Very expensive to buy |
| Acetal (POM) | Low friction sliding parts | Can warp if it gets too hot |
You should always cross out materials that fail your basic needs right away. If a metal rusts easily, and your part works under water, you must drop that metal from your list. This simple filter method saves you hours of bad choices. You should choose the easiest material that still does the exact job safely.
What geometric features and tolerances do your parts really need?
Are you paying too much for parts that take forever to make? Asking for super tight limits everywhere causes huge bills and long delays. I will explain how to set limits only where parts actually fit together.
You must match your tolerances and geometry to your real needs. Keep designs simple to cut costs. Avoid very deep pockets and extremely thin walls. Only ask for tight tolerances, like ±0.01mm, on critical areas where parts connect. Loose tolerances speed up the making process and save you money.
Geometry and limits can make or break your budget. I once worked with a smart mechanical engineer. He put a very strict limit on every single side of a metal box. The CNC machines had to run very slowly. The final cost was five times higher than normal. I called him and asked why. He said he just used a default setting in his drawing software. This is a very costly mistake.
Keep the shape easy to cut
You need to think about how the cutting tool moves. The CNC machine capabilities must match your design shape. Sharp inside corners are very hard to cut. The spinning tool is perfectly round. It leaves a round shape in the corner. You should always use generous internal curves in your drawing. This lets the tool move very fast. You should avoid super deep holes too. Tools can break easily if they go too deep into the metal. Do not make walls too thin. Thin metal vibrates and ruins the clean cut.
Only be strict when you must
Tolerance levels must match the real job of the specific area. If a steel pin needs to slide into a hole smoothly, you must use a tight limit there. For the outer edges that touch nothing, you should let the limits be loose.
Tolerance Cost Impact
| Tolerance Level | Cost Impact | Best Application |
|---|---|---|
| Standard (±0.1mm) | Low | Outer shells, basic brackets |
| Tight (±0.01mm) | High | Bearing fits, robot moving joints |
| Extreme (±0.005mm) | Very High | Aerospace tools, precise medical |
The best rule to follow is very simple. You should pick the absolute minimum hard shapes. You only demand perfection where the part actually touches another moving piece. This keeps the machine run time short and your wallet happy.
Why are surface finishes and post-machining processes so important?
Does your finished part look bad or wear out too fast? Leaving parts raw from the machine can lead to quick damage and rust. The right final touch makes your part stronger and look much better.
Surface finish changes how your part works and looks. A good finish stops rust and makes moving parts slide easily. Post-machining steps, like heat treatment or special coatings, add deep strength. These final steps protect your parts from harsh conditions and give them a professional, ready-to-sell look.
I have seen perfect parts ruin a big project just because of a bad finish. A customer once ordered custom joints for a new robot arm. The metal shapes fit together perfectly on day one. But they skipped the hard coating step to save a few dollars. After three weeks of testing, the raw metal rubbed against the raw metal. The parts wore down fast and became very loose. The whole machine failed.
Looks matter, but function matters more
Surface finish changes both the look and the daily action of your parts. A smooth surface is great for pieces that slide together. A rough surface might be much better if you want to glue something to it later. You must tell the shop exactly what texture you need. A clear number tells the machine how smooth to make the cut.
Adding deep strength to the metal
Post-machining processes are very important for long life. Heat treatment is a perfect example of this. It bakes the soft metal to make it very hard. This stops the part from bending under heavy daily loads. Anodizing is another great choice for aluminum parts. It adds nice colors and stops deep rust at the exact same time.
Common Finishes
| Finish Type | Main Benefit | When to Use It |
|---|---|---|
| As Machined | Cheapest basic option | Hidden inside parts, early tests |
| Bead Blasting | Removes ugly tool marks | Outer parts that people see |
| Hard Anodizing | Stops rust, adds strength | Robot shells, heavy wear parts |
| Heat Treatment | Makes soft metal very hard | High stress moving pieces |
You must not treat the final finish as an afterthought. It is a core part of your true part design. It protects your hard work from the harsh real world.
How can prototyping save your mass production budget and lead time?
Are you rushing straight to making a thousand parts? Finding a fatal design flaw during mass production is a nightmare that costs thousands. Making a few test parts first saves you from huge money losses.
Prototype testing is a vital step before mass production. Making a quick, single part lets you check the fit and function in real life. It helps you catch errors early. For prototypes, you should prioritize fast and flexible materials. This testing keeps your final lead times safe and predictable.
Many people want to rush straight to the end. They have strict deadlines from their boss. They order one thousand metal pieces right away. I always tell them to wait and test first. I once had a client who skipped the test phase totally. When the big box of heavy parts arrived in Germany, the main screw hole was one millimeter too small. We had to throw all the parts in the trash. It was a huge waste of time and money.
Test the real thing first
Prototype testing is a very important step for checking the true design. A computer screen cannot show you everything in real life. You need to hold the physical part in your bare hands. You need to screw it into your actual machine. Does it fit tight? Does it hit another wire by accident? You can only know this with a real test part.
Keep test lead times short
Lead time needs are huge here. You want your test part fast so you can fix errors. You should use a cheap, easy material for the very first test. If the final part is hard steel, you can test the basic shape with cheap aluminum first.
Prototype vs Production
| Phase | Focus Area | Material Choice |
|---|---|---|
| Early Test | Speed, checking basic shape | Cheap plastic or soft aluminum |
| Final Test | Real world action and load | Final intended tough material |
| Mass Run | Low cost, exact copy match | Final approved material |
Taking one extra week to make a cheap prototype saves you many months of delays later. It gives your team true confidence. When you finally order the big batch, you know every single piece will work perfectly out of the box.
How do you balance cost and choose the right CNC supplier?
Are you picking the shop with the absolute lowest price? Cheap quotes often mean hidden flaws, bad materials, and broken promises. You must find a shop that gives you fair prices and true reliability.
Cost analysis is very important when choosing parts. Complex shapes and tough materials raise your bill fast. But the lowest price is not always the best choice. You must check the supplier reputation and their certifications. A trusted shop ensures high quality, clear communication, and delivers your parts on time.
Price is always on everyone’s mind during a project. But the true cost is much more than just the bottom number on the paper quote. If a cheap part breaks your main machine, it is actually the most expensive part you ever bought. I started QuickCNCs because I saw many overseas buyers getting tricked by bad shops. They got cheap prices but terrible parts.
Look at the whole cost picture
Cost checking is very important for your project health. Pricing changes based on how hard the part is to cut. It changes based on the raw material block you buy. If you want a cheaper part, you must make the design much simpler. Do not just look for a cheaper shop to do a hard job. You should look for ways to save material waste.
Find a partner, not just a simple shop
Supplier reputation and basic certifications matter a lot. A good shop tells you when your design is hard to make. They suggest much better ways to cut it. They answer your daily emails very fast. If you need parts for a robot in Europe, you need clear talk and fast replies to stay on schedule.
Supplier Check Guide
| What to Check | Why It Matters | Red Flag to Avoid |
|---|---|---|
| Certifications | Shows they follow strict rules | No basic quality papers at all |
| Machine Types | Proves they can do complex cuts | Only have old, slow basic tools |
| Talk Speed | Keeps your big project moving | Takes many days to send one email |
| Past Work | Shows they know your field | Will not show any past test parts |
You should choose the right partner to get deep peace of mind. You send the drawing file, and you know the good parts will arrive safely at your door.
To choose CNC parts, match the material to the job, keep designs simple, test prototypes first, and partner with a reliable supplier to ensure perfect quality every single time.