Are you struggling to ensure your machined parts meet the required specifications? You’ve put ISO 2768 on your drawing, but you’re not sure if your supplier is checking it correctly. This uncertainty can lead to assembly failures, wasted time, and budget overruns, causing major project delays.
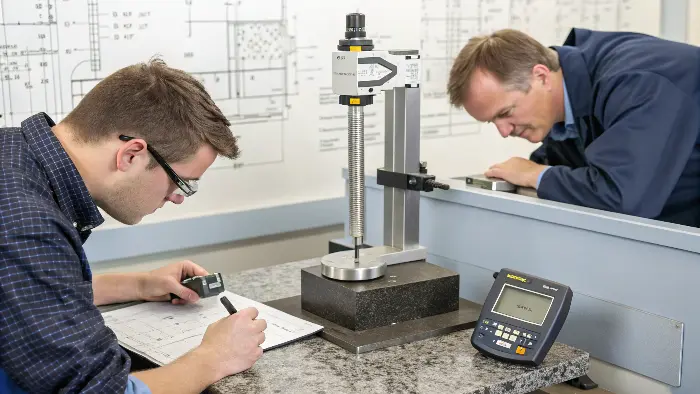
To measure and verify ISO 2768 tolerances, you need a combination of standard inspection tools and methods. For linear dimensions (Part 1), use calibrated calipers and micrometers. For geometric tolerances (Part 2), you need more advanced tools like Coordinate Measuring Machines (CMMs), height gauges, and granite surface plates to check features like flatness, straightness, and perpendicularity. A systematic inspection plan is crucial for accurate verification.

Verifying tolerances isn’t just about having the right tools. It’s about understanding what the standard means and how it applies to your specific part. Many engineers just add "ISO 2768-mK" to their drawings without fully grasping the implications for inspection and cost. A deeper knowledge helps you communicate better with your manufacturing partner and ensures you get the quality you expect without overpaying. Let’s dive into what this standard really means for your parts.
What is the general ISO standard for machining tolerances?
Are you trying to figure out the best way to specify tolerances without cluttering your drawings? It’s a common problem. Defining a tolerance for every single dimension is time-consuming and can make drawings hard to read. This often leads to confusion and manufacturing errors down the line.
The primary ISO standard for general machining tolerances is ISO 2768. This standard simplifies drawings by providing a default set of tolerances for linear, angular, and geometric features that do not have specific tolerances indicated. It allows engineers to specify a general precision level for the entire part, saving time and improving clarity. It’s split into two parts: ISO 2768-1 for dimensions and ISO 2768-2 for geometry.

In my early days in the workshop, I saw firsthand how confusing drawings could be. We once received a drawing for a simple mounting bracket that was covered in dozens of individual tolerances. The engineer wanted to be thorough, but it made the part seem incredibly complex. We spent hours just trying to interpret the drawing, and the final quote was higher because of that complexity.
The truth is, not every feature needs a super-tight, custom tolerance. Many dimensions are non-critical. This is where ISO 2768 becomes so powerful. It’s a system of ‘general tolerances’ that applies to any dimension on your drawing unless you specify otherwise.
Here’s a breakdown of how it works:
- Simplifies Design: You don’t have to calculate and write down a tolerance for every single length, angle, or radius. You just add a note like "ISO 2768-m" to your drawing.
- Reduces Errors: It creates a clear, universal baseline. Both the designer and the machinist understand the expected level of precision without needing to clarify dozens of points.
- Controls Cost: It prevents "over-tolerancing." Applying tight tolerances everywhere dramatically increases machining time and cost. Using a general standard ensures that only the critical features get special attention, keeping costs down.
Think of it as setting the default rules for the game. Unless you call out a specific play, everyone knows to follow the standard procedure.
How does the ISO standard for drawing tolerances work in practice?
You know that using a standard is good practice, but how does it actually make the journey from your design to a finished part smoother? You might worry that a general tolerance isn’t precise enough, or that the machinist might misinterpret it. These concerns are valid if the system isn’t understood by both sides.
The ISO 2768 standard works by assigning a tolerance class to your part. For example, writing "ISO 2768-mK" on a drawing tells the machinist two things. First, "m" (medium) from Part 1 sets the acceptable deviation for all linear and angular dimensions. Second, "K" from Part 2 sets the general tolerance for geometric features like flatness and perpendicularity. This single note replaces dozens of individual callouts.

Let me give you a practical example. I recently worked with a client, Alex from Germany, on a set of aluminum housings for a robotics project. His drawings were clean and simple, with the note "ISO 2768-mK" in the title block. He only added specific, tighter tolerances on three critical features: a bearing bore, a motor mount surface, and an alignment pinhole.
This was perfect. We knew immediately how to approach the job.
- General Features: For all the non-critical slots, outer walls, and chamfers, we followed the ‘medium’ (m) tolerance class. Our machinists could use standard cutting parameters, and we verified these dimensions with digital calipers. This was fast and efficient.
- Geometric Control: The ‘K’ class provided general control over the part’s form. It ensured the main surfaces were reasonably flat and square to each other, preventing any major warping or distortion without needing extra inspection steps for every surface.
- Critical Features: We focused all our attention on the three features Alex had identified. For the bearing bore, we used a precision boring machine and inspected it with a bore gauge. For the motor mount, we used a surface grinder and verified its flatness on a CMM.
This approach, guided by the ISO 2768 standard, allowed us to be efficient and cost-effective. We didn’t waste time and money holding non-critical features to unnecessarily high standards. The standard provided a clear framework that made communication effortless.
What are the tolerance values in ISO 2768?
You’ve decided to use ISO 2768, but what do the letters ‘f’, ‘m’, ‘c’, and ‘v’ actually mean in terms of numbers? It’s frustrating to use a standard if you can’t visualize the acceptable deviation. Without knowing the specific values, you can’t confidently choose the right class for your part’s function and budget.
ISO 2768-1 defines four tolerance classes for linear and angular dimensions: ‘f’ (fine), ‘m’ (medium), ‘c’ (coarse), and ‘v’ (very coarse). The ‘medium’ class is the most common. For a 100 mm long feature, the acceptable deviation would be ±0.3 mm for ‘m’, but only ±0.15 mm for ‘f’, showing how the class impacts precision.

Choosing the right class is a balance between precision and cost. I always advise my clients to use the least restrictive tolerance class that still allows their design to function correctly. Pushing for ‘fine’ when ‘medium’ will do can increase machining costs by 20-30% or more. Why? Because holding tighter tolerances often requires slower machine speeds, more expensive tools, and more in-depth inspection processes.
Let’s break down the values from ISO 2768-1.
Table 1: Permissible Deviations for Linear Dimensions
| Dimension Range (mm) | Fine (f) | Medium (m) | Coarse (c) | Very Coarse (v) |
|---|---|---|---|---|
| 0.5 up to 3 | ±0.05 | ±0.1 | ±0.2 | – |
| > 3 up to 6 | ±0.05 | ±0.1 | ±0.3 | ±0.5 |
| > 6 up to 30 | ±0.1 | ±0.2 | ±0.5 | ±1 |
| > 30 up to 120 | ±0.15 | ±0.3 | ±0.8 | ±1.5 |
| > 120 up to 400 | ±0.2 | ±0.5 | ±1.2 | ±2.5 |
| > 400 up to 1000 | ±0.3 | ±0.8 | ±2 | ±4 |
| > 1000 up to 2000 | ±0.5 | ±1.2 | ±3 | ±6 |
Table 2: Permissible Deviations for Radii and Chamfers
| Dimension Range (mm) | Fine (f) / Medium (m) | Coarse (c) / Very Coarse (v) |
|---|---|---|
| 0.5 up to 3 | ±0.2 | ±0.4 |
| > 3 up to 6 | ±0.5 | ±1 |
| > 6 | ±1 | ±2 |
As you can see, the tolerance grows with the dimension. This is because it’s naturally harder to maintain high precision over a longer distance. This standard provides a practical, realistic baseline for what can be achieved with good machining practices without extra, costly effort.
What does the ‘mK’ in ISO 2768-mK actually mean?
You’ve seen "ISO 2768-mK" on drawings, but what do the two letters stand for? It’s confusing when one standard has two different parts. You might wonder if you are specifying something too complex or if ‘m’ alone is enough. This uncertainty can lead to miscommunication with your manufacturer.
The designation "mK" combines two parts of the standard. The "m" comes from ISO 2768-1 and sets the "medium" tolerance for linear and angular dimensions. The "K" comes from ISO 2768-2 and sets the tolerance class for geometric features like flatness, straightness, and perpendicularity. Using both letters provides comprehensive control over the part’s size and form.

Understanding this distinction is vital. Part 1 (the letter ‘m’) controls size. Part 2 (the letter ‘K’) controls shape. You can have a part that is the right size but is bent or warped, making it useless. I had a case with a long, thin plate where all the hole diameters and edge lengths were perfectly within the ‘m’ tolerance. However, the client didn’t specify a geometric tolerance. The plate had a slight bow after machining, which was a problem for assembly. If the drawing had included class ‘K’, it would have set a clear limit for flatness, and we would have used a different clamping strategy or added a stress-relieving step to prevent the bow.
ISO 2768-2 (Geometric Tolerances) has three classes:
- H: Fine
- K: Medium
- L: Coarse
Here is what Class K typically controls:
| Geometric Tolerance | Description | Inspection Method |
|---|---|---|
| Flatness | How flat a surface is without peaks or valleys. | CMM, granite surface plate with a dial indicator |
| Straightness | How straight an edge or axis is. | CMM, straight edge, dial indicator |
| Perpendicularity | How close to a perfect 90° angle two features are. | CMM, granite square, height gauge |
| Symmetry | How well-balanced features are around a central axis. | CMM, calipers |
| Circularity | How close to a perfect circle a feature is. (run-out) | CMM, V-block with a dial indicator |
The tools required to verify these geometric tolerances are more sophisticated than simple calipers. My inspection team relies heavily on our Coordinate Measuring Machine (CMM). It uses a sensitive probe to take hundreds of points on a surface to create a 3D map of the part, which it then compares to the CAD model. This is the only reliable way to verify complex geometric tolerances and check for issues like tolerance accumulation, where small, acceptable deviations on multiple features add up to cause a major problem in the final assembly.
Conclusion
In short, mastering ISO 2768 means better communication, cost control, and reliable parts. It simplifies your drawings and focuses attention where it matters most, ensuring a smoother manufacturing process.
