Struggling to design a transmission shaft that won’t fail under pressure? A miscalculation can lead to catastrophic equipment failure, causing expensive downtime and safety risks. Getting the design right from the start is critical for any mechanical system’s reliability.
The key to designing a transmission shaft is to calculate the minimum required diameter by applying a combined stress theory. This involves determining the maximum torque and bending moment the shaft will experience, selecting an appropriate material with a known allowable stress, and then using a formula like the one from the ASME code to solve for the diameter.

Understanding the formulas is one thing, but applying them correctly is what separates a good engineer from a great one. Over my years in CNC machining, I’ve seen designs that were theoretically sound but failed to account for real-world factors. I’ve worked with engineers like Alex, a detail-oriented professional from Germany, who demand precision not just in manufacturing but in the design phase itself. In this guide, I’ll walk you through the entire process, step by step, from gathering initial requirements to applying industry-standard codes. We will break down the complex into the simple, ensuring your next shaft design is both safe and efficient.
What Is the Best First Step for a Shaft System Designer?
Starting a design project without a clear roadmap is a recipe for disaster. You end up with endless revisions, wasted time, and a final product that might not even work. The most efficient path begins with a single, clear action.
The best first step for any shaft system designer is to comprehensively define all functional and operational requirements. This means identifying the power to be transmitted, the operating speed (RPM), the precise locations and magnitudes of all forces from gears and pulleys, and the positions of all supporting bearings before any calculation begins.

Dive Deeper
Defining requirements is the foundation upon which your entire design rests. A weak foundation will inevitably lead to problems down the line. I learned this the hard way on an early project involving a large conveyor system. The client gave me a rough estimate of the power requirements. We machined the shaft to spec, but during testing, it experienced severe vibration and eventually failed. The problem wasn’t the machining; it was the design. We discovered the start-up torque was nearly double the average running torque, a detail that was missed in the initial brief. This taught me to be relentlessly thorough at the start. For my clients now, especially those like Alex who work on high-stakes robotics, we use a detailed checklist.
1. Identify Power, Speed, and Torque
The primary function of a transmission shaft is to transmit power. You must know exactly how much power (in Watts or Horsepower) the shaft needs to handle and at what rotational speed (in RPM). These two values allow you to calculate the fundamental force acting on the shaft: torque.
Torque (T) = (Power * 9550) / Speed (RPM) (when Power is in kW and Torque is in N-m).
2. Map All External Loads
Shafts rarely just experience pure torque. They are almost always subjected to bending forces from components mounted on them. You need to create a free-body diagram that clearly shows:
- Gears: Tangential, radial, and sometimes axial forces.
- Pulleys/Sprockets: Bending forces from belt or chain tension.
- Weight: The weight of the shaft itself and any components on it.
3. Determine Support and Geometric Constraints
Where will the shaft be supported? The location of bearings is crucial as it determines how bending moments are distributed across the shaft. You also need to consider geometric features like keyways, shoulders, and snap ring grooves. These features create stress concentrations that must be accounted for in your calculations, as they are common points of failure.
Here is a basic checklist I use to start any shaft design project:
| Requirement Category | Specific Details to Define |
|---|---|
| Operational Loads | Maximum Power (kW/HP), Operating Speed (RPM), Torque (N-m) |
| External Forces | Gear forces, belt/chain tension, component weights |
| Support System | Bearing types and precise locations |
| Geometry | Overall length, required diameters at specific points |
| Environment | Operating temperature, exposure to corrosive elements |
| Service Life | Expected operational hours, number of load cycles |
Spending an extra hour gathering these details at the beginning can save you days of redesign and remanufacturing later. It’s the most important investment you can make in the design process.
What Are the Three Main Design Considerations for Shafts?
A shaft that is strong enough to not break might still be a complete failure in a precision system. If you only focus on strength, you risk overlooking other critical factors that can cause noise, vibration, and premature failure of surrounding components.
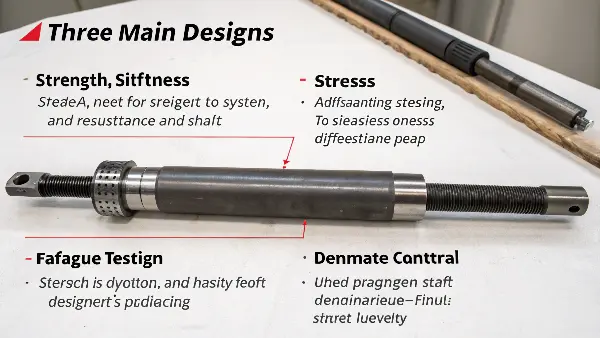
The three primary design considerations for shafts are strength, stiffness, and fatigue resistance. Strength prevents the shaft from breaking or permanently bending under peak loads. Stiffness controls deflection to maintain alignment. Fatigue resistance ensures the shaft can survive millions of load cycles without failing.

Dive Deeper
Many young engineers I’ve mentored tend to focus almost exclusively on static strength. They calculate the maximum stress and ensure it’s below the material’s yield strength. While essential, this is only part of the story. I once consulted for a client whose new gearbox design was failing field tests despite the shafts being theoretically strong enough. The issue was stiffness. The shafts were deflecting too much under load, causing the gear teeth to misalign, which led to excessive noise and wear. We had to increase the shaft diameter not for strength, but to improve its rigidity. This experience highlighted the interconnectedness of these three key pillars.
1. Strength (Resisting Failure)
This is the most fundamental consideration. The shaft must be strong enough to withstand the maximum loads it will experience without yielding (permanent deformation) or fracturing (breaking). This involves calculating the stresses caused by bending moments and torque and comparing them to the material’s properties.
- Key Material Properties: Yield Strength (Sy) and Ultimate Tensile Strength (Sut).
- Goal: The maximum stress in the shaft must remain well below the yield strength, with an appropriate factor of safety.
2. Stiffness (Maintaining Form)
Stiffness, or rigidity, is the shaft’s ability to resist bending or twisting under load. It is a function of the material’s Young’s Modulus (E) and the shaft’s geometry (specifically, its diameter).
- Why it Matters: Excessive bending (deflection) can cause problems like gear misalignment, bearing damage, and vibrations. In many precision machines, the allowable deflection is the controlling factor in the shaft’s design, often requiring a larger diameter than strength alone would dictate.
- Goal: Keep angular and linear deflection within the tolerances specified by the components mounted on the shaft (e.g., gears, bearings).
3. Fatigue Resistance (Enduring the Job)
Most transmission shafts are subjected to fluctuating loads as they rotate. A point on the surface of a rotating shaft under a constant bending load experiences a complete reversal of stress with every revolution. These repeated cycles can cause a crack to form and grow, eventually leading to failure, even if the maximum stress is far below the material’s yield strength. This is called fatigue failure.
- Key Material Property: Endurance Limit (Se), the stress level below which a material can theoretically endure an infinite number of load cycles.
- Goal: Design the shaft so that the operating stresses, especially at stress concentrations like keyways, are below the material’s endurance limit for the required service life.
These three considerations often work in opposition, requiring a balanced design.
| Consideration | Primary Goal | Key Design Factor | Common Failure Mode |
|---|---|---|---|
| Strength | Prevent permanent bending or breaking | Maximum Stress vs. Yield Strength | Material yields or fractures from a single overload. |
| Stiffness | Limit deflection and maintain component alignment | Shaft Diameter & Young’s Modulus | Excessive vibration, noise, or premature gear/bearing wear. |
| Fatigue Resistance | Survive a high number of rotational load cycles | Operating Stress vs. Endurance Limit | Cracks form and grow over time, leading to sudden failure. |
A successful design finds the optimal diameter and material that satisfies all three criteria for the intended application.
How Do You Perform a Shaft Design Calculation?
Moving from design considerations to a concrete number for your shaft’s diameter can seem intimidating. With so many forces at play, where do you even start the calculation? The key is to follow a structured, step-by-step process.
To perform a shaft design calculation, you first calculate the torque from power and speed. Next, you construct shear and bending moment diagrams to find the maximum bending moment. Finally, you use a combined stress theory, such as the Maximum Shear Stress Theory, to input these values into a formula and solve for the required diameter.

Dive Deeper
When an engineer like Alex sends me a design for a critical robotic component, I can tell a lot about their process by looking at their supporting calculations. A well-documented calculation shows a clear, logical flow. Let’s break down that flow into actionable steps. We will assume we are designing a solid, round shaft, which is the most common scenario.
Step 1: Calculate the Driving Torque (T)
This is typically the easiest part. As we discussed earlier, the torque is directly related to the power the shaft transmits and its rotational speed.
- Formula:
T (N-m) = [P (kW) * 9550] / N (RPM) - This torque represents the twisting force that the shaft must resist.
Step 2: Determine the Maximum Bending Moment (M)
This step requires more work. You need to model the shaft as a beam supported by bearings and loaded by forces from gears or pulleys.
- Draw a Free-Body Diagram: Show all forces acting on the shaft and the reaction forces at the bearings.
- Draw Shear and Bending Moment Diagrams: These diagrams are graphical representations of the shear force and bending moment along the length of the shaft. The standard method is to work from one end of the shaft to the other, calculating the values at key points (where forces are applied or bearings are located).
- Identify Maximum Bending Moment (M): From your bending moment diagram, you can pinpoint the location and magnitude of the maximum bending moment. This is a critical value for your calculation.
Step 3: Combine Stresses and Calculate Diameter (d)
A point on the shaft’s surface experiences both bending stress (σ) from the moment M and torsional shear stress (τ) from the torque T. We need a theory to combine these into an equivalent stress that we can use for design. The most common and slightly more conservative theory for ductile materials (like most steels) is the Maximum Shear Stress Theory (MSST or Tresca’s criterion).
The theory leads to the following design equation for a solid round shaft:
d³ = (16 / (π * τ_allowable)) * √[(M)² + (T)²]
Wait, what about fatigue and stress concentrations? The simple formula above is for static loads only. A more practical and comprehensive version incorporates factors to account for real-world conditions:
d³ = (16 / (π * τ_allowable)) * √[(K_b * M)² + (K_t * T)²]
Here’s a breakdown of the variables in this crucial formula:
| Symbol | Description |
|---|---|
| d | The required minimum diameter of the shaft (this is what you are solving for). |
| τ_allowable | The allowable shear stress for the shaft material, including a factor of safety. |
| M | The maximum bending moment found in Step 2. |
| T | The driving torque found in Step 1. |
| K_b | The combined shock and fatigue factor applied to the bending moment (typically between 1.0 and 3.0). |
| K_t | The combined shock and fatigue factor applied to the torque (typically between 1.0 and 3.0). |
By plugging in your values for M, T, the material’s allowable stress, and appropriate K-factors, you can solve for d and find the minimum required diameter for your shaft.
What Is the ASME Code for Shaft Design?
While your own calculations are essential, relying on a globally recognized standard adds another layer of safety, reliability, and defensibility to your design. It can be a requirement for certain industries. This is where the ASME code comes in.
The ASME Code for the Design of Transmission Shafting is a widely accepted standard that provides a robust equation for calculating shaft diameter. It consolidates bending moment (M) and torque (T) with factors for shock and fatigue, ensuring the design accounts for both static and dynamic stresses in a conservative manner.

Dive Deeper
I often recommend my clients, especially those working on industrial machinery or robotics where failure is not an option, to check their designs against the ASME code. It’s essentially the equation we just discussed but with more formally defined parameters and factors. It provides a standardized framework that ensures all designers are speaking the same language. The code provides a formula that is very similar in structure to the MSST equation we saw earlier, but it is specifically tailored for fatigue and shock loading.
The ASME Equation Explained
The ASME formal equation for a solid round shaft is:
d³ = (16 / π) * √[ (K_b * M / S_y)² + (K_t * T / S_e)² ] * (S_y / τ_allowable)
This looks complex, but it’s just a more detailed version. A simplified and more commonly used form, which is functionally equivalent for ductile materials under the MSST, is presented as:
d³ = (16 / (π * τ_allowable)) * √[(K_b * M)² + (K_t * T)²]
The power of the ASME code lies not just in the formula itself, but in the guidance it provides for selecting the factors.
Understanding the Shock and Fatigue Factors (Kb and Kt)
These factors are the core of the ASME approach. They are not just theoretical stress concentration factors; they are empirical values based on decades of experience and testing. They adjust the steady bending moment and torque values to account for the nature of the load.
| Nature of Loading | Kb (for Bending) | Kt (for Torque) |
|---|---|---|
| Stationary Shaft, Gradually Applied Load | 1.0 | 1.0 |
| Rotating Shaft, Gradually Applied Load | 1.5 | 1.0 |
| Rotating Shaft, Suddenly Applied Minor Shock | 1.5 – 2.0 | 1.0 – 1.5 |
| Rotating Shaft, Suddenly Applied Heavy Shock | 2.0 – 3.0 | 1.5 – 3.0 |
By selecting the appropriate factors from a table like this, you build a factor of safety directly into your load calculations. For example, the drive shaft on a rock crusher (heavy shock) would use much higher Kb and Kt values than a shaft in a smoothly running electric fan (gradually applied load).
Why Use the ASME Code?
- Standardization: It provides a common, defensible method for design. If your design is ever questioned, citing adherence to the ASME code carries significant weight.
- Safety: The code is inherently conservative. It’s designed to prevent failure by incorporating factors that account for uncertainties and dynamic effects that are easy to overlook.
- Reliability: It explicitly accounts for fatigue, which is the cause of the majority of shaft failures in rotating machinery. By using fatigue-based criteria from the start, you are designing for long-term durability.
For any critical application, using the ASME code isn’t just a suggestion; it’s a best practice that ensures your design is robust, safe, and built to last.
Conclusion
Effective shaft design balances strength, stiffness, and fatigue. Following a systematic process, from defining requirements to applying proven calculation methods, ensures reliable and efficient performance for any mechanical system.
