Machining seems simple, but it can secretly weaken your parts. Discover how to maintain integrity and avoid costly failures in your designs.
Machining can introduce heat, residual stresses, and surface defects, altering a metal’s microstructure and potentially reducing its strength and fatigue life. Proper techniques and post-processing are crucial for robust parts.
When I first started in a CNC shop, I was focused on just getting the dimensions right. But as I gained experience, especially working with engineers like Alex who demand high-performance parts for robotics, I learned a crucial lesson: how you machine a part is just as important as what you machine. The forces, temperatures, and surface changes involved in cutting metal can significantly alter its inherent strength. It’s a complex interaction, and understanding it is key to preventing unexpected failures and ensuring your designs perform as intended. Let’s explore how these processes can affect your material and what you can do about it.
How Can Heat from Machining Weaken Metal Parts?
Intense heat during cutting can ruin your metal’s temper. Don’t let high temperatures compromise your design’s carefully chosen strength properties.
Excessive heat from machining can cause detrimental microstructural changes like grain growth, annealing, or localized re-hardening and tempering, significantly reducing the metal’s original strength and toughness.
The cutting process inherently generates heat due to friction and plastic deformation of the workpiece material. If this heat isn’t managed, temperatures at the tool-chip interface and in the subsurface of the part can skyrocket. For many metals, especially heat-treated alloys that Alex might specify for high-stress robotic components, this is bad news.
Here’s a breakdown of what can happen:
- Annealing/Over-Tempering: Heat-treated steels, for instance, get their strength from a carefully controlled microstructure (like martensite). If machining heat exceeds the tempering temperature, or even the annealing temperature, the material can soften, losing its hardness and strength. I’ve seen parts that were specified to be HRC 55 come out at HRC 45 because of aggressive, dry machining.
- Grain Growth: At elevated temperatures, metal grains can grow larger. Larger grains generally mean lower strength and toughness. This is particularly a concern in materials sensitive to thermal cycling.
- Phase Changes: In some alloys, excessive heat can induce undesirable phase transformations, altering the material properties in unpredictable ways. This could even lead to localized hardening and increased brittleness in some spots, while softening others.
- Increased Susceptibility to Corrosion: Thermally altered surfaces can sometimes exhibit different electrochemical potentials, making them more prone to certain types of corrosion.
Managing heat through proper coolant application, sharp tooling, and optimized cutting parameters is not just about tool life; it’s fundamental to preserving the material’s integrity.Are Residual Stresses from Machining Always Bad for Strength?
Hidden stresses from machining can be a ticking time bomb. Learn how these internal forces can make or break your component’s performance.
Machining introduces residual stresses. Tensile residual stresses are generally detrimental, promoting crack initiation and fatigue, while compressive residual stresses can be beneficial by inhibiting crack propagation.
Whenever you cut, bend, or deform metal, you’re introducing internal stresses that remain even after the machining forces are removed. These are called residual stresses. They are a result of non-uniform plastic deformation in the surface layer of the material during chip formation and due to thermal gradients.
The nature of these stresses is critical:
- Tensile Residual Stresses: These act to pull the material apart. If a part has high tensile residual stresses on its surface, it’s like it’s already partially loaded. This makes it easier for cracks to start, especially under fatigue conditions (repeated loading) or in corrosive environments (stress corrosion cracking). For Alex’s robotic arms, which experience dynamic loads, high tensile stresses would be a major concern for fatigue life.
- Compressive Residual Stresses: These act to push the material together. Compressive stresses on the surface are often beneficial. They can counteract applied tensile loads, making it harder for cracks to initiate or propagate. Processes like shot peening are specifically designed to introduce beneficial compressive stresses.
The type and magnitude of residual stress depend on many factors: cutting parameters (speed, feed, depth of cut), tool geometry (rake angle, nose radius), tool wear, and the material itself. For example, aggressive cutting or using dull tools tends to produce higher tensile residual stresses. Grinding, if not done carefully, can also introduce significant tensile stresses due to high localized heat. Understanding and controlling these stresses, perhaps through post-machining stress relief heat treatments or by choosing machining strategies that impart compressive stresses, is vital for critical applications.Does Surface Finish Influence a Machined Part’s Fatigue Life?
A rough surface isn’t just ugly; it’s a weak point. See how the finish from machining directly impacts your part’s endurance under stress.
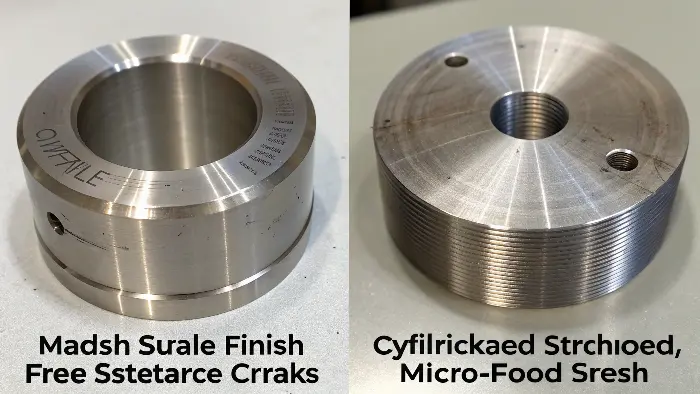
Poor surface finish with scratches, tool marks, and micro-cracks creates stress concentrators. These can act as initiation sites for fatigue cracks, drastically reducing the part’s strength and life under cyclic loads.

When I review drawings from engineers like Alex, surface finish callouts (like Ra values) are always something I pay close attention to, especially for dynamically loaded parts. It’s not just about aesthetics; it’s fundamentally linked to strength, particularly fatigue strength.
Here’s why the surface matters so much: - Stress Concentration: Every tiny scratch, notch, or tool mark on a machined surface can act as a stress concentrator. Think of it like a tiny lever that magnifies the local stress. Under cyclic loading, these high-stress points become the preferred locations for fatigue cracks to start.
- Micro-Cracks: Some machining processes, especially aggressive ones or those done with worn tools, can introduce microscopic cracks or tears on the surface. These are pre-existing flaws that can grow rapidly under load.
- Altered Surface Layer: The very top layer of a machined part (the "skin") often has different properties than the bulk material due to plastic deformation and heat. If this layer is damaged or has a poor topography, it compromises the part’s ability to resist crack initiation.
Smoother finishes, achieved through processes like fine turning, grinding, polishing, or lapping, generally lead to better fatigue life because they minimize these stress raisers. For example, a ground surface will typically have a much better fatigue performance than a rough milled surface for the same material and geometry. It’s a direct trade-off: better finish often means more processing time and cost, but for critical components, it’s an investment in reliability and longevity.How Does Work Hardening During Machining Alter Material Properties?
Machining can make metal harder, but is that always good for strength? Understand the trade-offs of work hardening on your components.
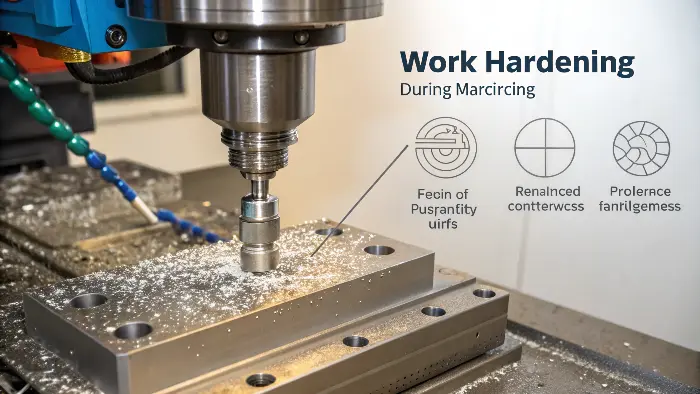
The plastic deformation during machining can cause work hardening (strain hardening), increasing surface hardness and yield strength but potentially reducing ductility, toughness, and making subsequent machining difficult.

Work hardening, also known as strain hardening, is a phenomenon where a metal becomes harder and stronger as it is plastically deformed. Since machining inherently involves deforming the material to form a chip, some degree of work hardening in the machined surface and subsurface is almost inevitable, especially in ductile materials.
Here’s a look at the implications:Effect of Work Hardening Implication for Material Properties Increased Hardness Improves wear resistance on the surface. This can be beneficial for components that experience sliding or abrasive contact. Increased Yield Strength The material can withstand higher stress before permanent deformation. Reduced Ductility The material becomes more brittle and can fracture with less plastic deformation. This can be a negative for impact resistance. Reduced Toughness The ability of the material to absorb energy and plastically deform before fracturing may decrease. Increased Residual Stress Work hardening often goes hand-in-hand with the introduction of residual stresses, which can be tensile or compressive. Difficulty in Subsequent Machining If a surface is significantly work-hardened, further machining operations on that surface can be more challenging, leading to increased tool wear. Materials like austenitic stainless steels (e.g., 304, 316) and some aluminum alloys are particularly prone to work hardening. For these, it’s important to use sharp tools and maintain a consistent depth of cut to get below any previously hardened layer. While a harder surface can be good, the potential loss of ductility or the creation of high internal stresses needs careful consideration by the design engineer. Alex might encounter this if designing with stainless steel parts that need to withstand both wear and some level of impact.
What Machining Strategies Help Preserve or Enhance Metal Strength?
Don’t let machining degrade your parts. Implement smart strategies to protect or even improve metal strength from the cutting process.
To preserve strength, use sharp tools, appropriate speeds/feeds, effective cooling/lubrication, and consider stress-relieving heat treatments or surface enhancements like shot peening after machining.

Knowing that machining can degrade strength is one thing; knowing how to prevent it is another. Over my years in manufacturing, I’ve learned that a combination of careful planning, correct tooling, optimized parameters, and sometimes post-machining treatments is key.
Here are some best practices I always emphasize:- Use Sharp, Appropriate Tooling: Dull tools generate excessive heat, cause more material tearing (poor surface finish), and induce higher residual stresses and work hardening. The correct tool geometry (rake angles, relief angles, nose radius) for the specific material is also crucial.
- Optimize Cutting Parameters:
- Feed Rate: Too low can cause rubbing and heat; too high can cause excessive force and deformation.
- Cutting Speed: Influences temperature significantly. There’s often an optimal range.
- Depth of Cut: For materials prone to work hardening, ensure the depth of cut is below the previously hardened layer.
- Effective Cooling and Lubrication: Coolants reduce friction, carry away heat, and help flush chips. This minimizes thermal damage and can improve surface finish. Minimum Quantity Lubrication (MQL) or high-pressure coolant systems can be very effective.
- Machining Sequence: Plan operations to minimize distortion and unfavorable stress build-up. For example, roughing operations followed by finishing cuts allow for better control.
- Consider the Machining Process Itself: Some processes are inherently gentler. For instance, grinding can produce excellent surface finishes and tight tolerances but needs careful control to avoid thermal damage. Electrical Discharge Machining (EDM) produces a heat-affected zone that might need removal or treatment.
- Post-Machining Treatments:
- Stress Relief Annealing: A low-temperature heat treatment can reduce detrimental residual stresses without significantly affecting bulk hardness.
- Shot Peening/Laser Peening: These processes introduce beneficial compressive residual stresses on the surface, improving fatigue life.
- Polishing/Superfinishing: Further improves surface finish, removing micro-scratches and reducing stress concentrators.
For Alex, who designs precision parts, ensuring his manufacturing partners understand these strategies is vital. It’s a collaborative effort between the designer specifying the material and requirements, and the machinist executing the plan with care.Conclusion
Machining significantly impacts metal strength through heat, stress, and surface changes. Smart choices in process and technique are vital for reliable, high-performance parts.
