Struggling to balance precision with your budget? You specify tight tolerances to ensure quality, but your manufacturing quotes come back shockingly high. You need parts that work perfectly without overpaying for unnecessary precision on non-critical features. It’s a common engineering headache.
The key to cost-effective production is applying tolerances strategically. Start by using standard tolerances (like ISO 2768-m) as your default and only tighten them on functionally critical surfaces. This includes areas for mating parts, bearing fits, or precise alignments. For non-critical features, looser tolerances will significantly reduce machining time, tooling wear, and inspection costs, directly lowering your final part price without sacrificing performance.

Getting tolerances right is one of the most impactful skills in Design for Manufacturability (DFM). I’ve seen it make or break project budgets time and time again. Many engineers, especially early in their careers, fall into the trap of thinking tighter is always better. They apply a single, tight tolerance block to their entire drawing. This seems safe, but it’s actually one of the fastest ways to inflate costs. The truth is, not every surface needs to be perfect. The real skill is knowing where to spend your "tolerance budget." Let’s break down how this works in the real world, so you can design parts that are both high-quality and affordable to produce.
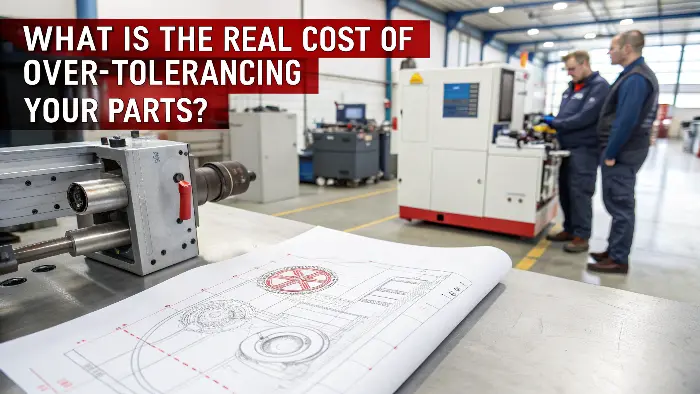
What Is the Real Cost of Over-Tolerancing Your Parts?
Are you specifying ultra-tight tolerances on every feature of your design? This attempt to guarantee quality might be secretly destroying your project’s budget. The sticker shock from the machine shop isn’t random; it’s a direct result of those demanding numbers on your drawing.
Over-tolerancing dramatically increases manufacturing costs by requiring more advanced machinery, specialized tooling, slower machining speeds, and more intensive quality inspection processes. Each tightened decimal point can lead to higher material scrap rates and longer lead times. This makes your part exponentially more expensive to produce, often for no functional benefit.

I remember a project with a new client, an engineer from a robotics startup. Let’s call him Alex. He sent over a drawing for an aluminum robotic arm joint. The design was excellent, but he had applied a ±0.01mm tolerance to nearly every surface. When he got our quote, he called me, confused by the high price.
I pulled up his CAD model and we walked through it together on a screen share. I asked him, "Which surfaces on this part are the most critical?" He pointed out the bore where a precision bearing would be pressed in and the flat face that mounted to another component. Those absolutely needed the tight control. But what about the outer cosmetic surfaces or the internal pockets for weight reduction? They didn’t touch anything.
I explained that holding that ±0.01mm tolerance everywhere forced us to take extra steps.
The Breakdown of Unnecessary Costs
- Slower Machining: To achieve a fine finish and tight tolerance, the CNC machine must run at lower feed rates and take shallower cuts. This increases the total machine time for each part. A part that might take 30 minutes with standard tolerances could take over an hour with tight ones.
- Specialized Tooling and Processes: A standard end mill might not be enough. We might need to add secondary processes like grinding, lapping, or honing. These are separate, often manual operations that add significant labor and time. A simple milled hole becomes a multi-step process: drill, bore, then ream or hone.
- Intensive Inspection: Measuring a standard tolerance might just require a good pair of digital calipers. Measuring ±0.01mm requires a controlled environment and more sophisticated tools like a Coordinate Measuring Machine (CMM). CMM inspection is slow and expensive, and booking time on the machine adds to the lead time.
Here’s a simple table to show how the costs add up for a single feature:
| Aspect | Standard Tolerance (±0.1mm) | Tight Tolerance (±0.01mm) | Cost Impact |
|---|---|---|---|
| Machining Process | Standard Milling | Milling + Grinding/Honing | High (Adds a new process step) |
| Cycle Time | ~10 minutes | ~25 minutes | High (More machine time per part) |
| Tooling | Standard End Mill | Precision Reamer, Grinding Wheel | Medium (Specialized, costlier tools) |
| Inspection | Calipers / Height Gauge | CMM / Air Gauge | High (Expensive equipment and expert time) |
| Scrap Rate | Low (<1%) | Higher (3-5%) | Medium (More parts might fail inspection) |
By the end of our call, Alex revised his drawing. He kept the tight tolerances on the critical bore and mounting face but relaxed everything else to a standard ±0.1mm. The new quote was nearly 40% lower. The final parts functioned perfectly in his robotic assembly, and he saved a huge portion of his prototyping budget. This is the power of smart tolerancing.
How Do You Choose the Right Tolerance for Different Features?
You understand that blanket tolerances are expensive, but now you’re looking at a complex part. How do you decide which surfaces need precision and which can be left alone? It feels like a guessing game, but a systematic approach can simplify the process entirely.
To choose the right tolerance, you must first classify the function of every feature. Assign tight tolerances only to features critical for fit or function, like bearing bores or mating faces. Use looser, standard tolerances for non-critical features like clearance holes, handles, and external cosmetic surfaces where variation won’t impact performance.

The best way to approach this is to think of your part as a collection of individual features, each with a specific job. Before you even assign a number, ask yourself, "What does this surface do?" and "What does it interact with?" Breaking it down this way removes the guesswork. I guide engineers through this thought process daily. We basically sort all the features into a few simple categories.
Category 1: Critical Fit and Function Features
These are the most important surfaces on your part and the only ones that deserve tight tolerances. Mistakes here mean the entire assembly fails.
- Mating Surfaces: Any surface that touches another part in an assembly. The tolerance here controls the alignment and stability between parts.
- Bearing or Press-Fit Bores: These holes require high precision to ensure a bearing is held securely without being damaged or having too much "play." The tolerance is often dictated by the bearing manufacturer’s specifications.
- Locating Pins and Holes: When you use pins to align two parts, the size and position of the holes are critical for the assembly to fit together correctly and repeatably.
For these features, you must carefully calculate the required precision. You’ll apply specific bilateral or unilateral tolerances and often use Geometric Dimensioning and Tolerancing (GD&T) to control not just size, but also form, orientation, and location.
Category 2: Clearance and Non-Critical Interface Features
These features interact with other components, but they don’t require a perfect fit. The goal here is just to ensure things go together without interference.
- Clearance Holes for Fasteners: A hole for an M5 screw doesn’t need to be exactly 5.00mm. It needs to be slightly larger so the screw can pass through easily. A standard tolerance is more than enough.
- Internal Pockets for Weight Reduction: The exact dimensions of these pockets usually don’t matter, as long as they don’t compromise the structural integrity of the part wall.
- Covers or Enclosures: For a simple lid that just sits on top of a box, the fit doesn’t need to be airtight unless you’re designing for IP ratings. A general tolerance ensures it looks right and sits properly.
For these areas, the default shop tolerance, like ISO 2768-m (medium) or -c (coarse), is your best friend. It’s what we machine to unless told otherwise, and it’s the most cost-effective.
Category 3: Purely Cosmetic Surfaces
These are surfaces that are seen but don’t touch anything.
- External, Non-Mating Faces: The outside walls of a housing, for example.
- Engraved Logos or Text: The exact depth or size is less important than its readability.
For these, the loosest possible tolerance is best. The focus here is on surface finish (Ra) rather than dimensional accuracy. Specifying a smooth surface finish is better than a tight tolerance for making a part look good.
By categorizing your features this way, you can build a tolerance strategy that puts precision exactly where it’s needed and nowhere else.
When Are Tighter Tolerances Actually Worth the Investment?
So we’ve established that you should avoid tight tolerances whenever possible. But what about the situations where they are not just beneficial, but absolutely necessary? Knowing when to invest in precision is just as important as knowing when to save money.
Tighter tolerances are worth the investment in high-performance applications where precision directly impacts safety, reliability, or functionality. This includes high-speed rotating assemblies, medical implants, aerospace components, and precision optical systems. In these cases, the cost of failure far outweighs the increased manufacturing cost.

While I spend a lot of my time helping clients reduce costs by loosening tolerances, some projects demand the opposite approach. In these scenarios, skimping on precision is not an option. The higher upfront manufacturing cost is an insurance policy against catastrophic failure, poor performance, or even safety hazards down the line. Over the years, I’ve machined thousands of parts where the tight tolerances were non-negotiable, and for very good reasons.
Applications Demanding High Precision
-
High-Speed Rotating Components: Think about engine crankshafts, turbine blades, or spindles in a CNC machine itself. In these parts, even a tiny imbalance or misalignment can cause severe vibrations at high RPMs. This leads to premature wear, noise, and potentially catastrophic failure. Here, tight tolerances on diameter, concentricity, and balance are critical for safe and stable operation. The small extra cost of grinding a shaft to a precise dimension is insignificant compared to the cost of a failed engine.
-
Medical Devices and Implants: When a part is going inside a human body, there is no room for error. A bone screw or a joint replacement must fit perfectly with the patient’s anatomy and with other implant components. Tolerances here are often measured in microns. We follow extremely strict protocols because a loose fit could lead to implant failure, and a tight fit could cause damage to the bone. The manufacturing and inspection process is rigorous, and the cost reflects the immense responsibility.
-
Aerospace and Defense: Components used in aircraft, satellites, or guidance systems operate in extreme environments. They are subject to massive temperature shifts, vibration, and mechanical stress. The fit and alignment of hydraulic actuators, landing gear components, or sensor mounts directly relate to the safety and mission success of the aircraft. In this industry, every feature is considered critical until proven otherwise, and parts are often 100% inspected with full traceability.
-
Optical and Scientific Instruments: For components that hold lenses, mirrors, or sensors, alignment is everything. In a laser system or a high-powered microscope, the position and angle of each optical element must be controlled with extreme precision. A slight positional error of a lens, even by a few hundredths of a millimeter, can render the entire instrument useless. GD&T callouts for perpendicularity, parallelism, and true position are essential.
In these fields, the question isn’t "How can we make this cheaper?" but "How can we guarantee it works, every single time?" When you’re designing for these applications, you must work closely with your manufacturing partner to ensure the required precision is achievable and verifiable. The investment is not just in the part, but in the performance and safety of the final product.
How Does Material Choice Affect Your Tolerancing Strategy?
You’ve carefully assigned tolerances based on function, but have you considered your material? The type of metal or plastic you choose has a huge impact on how easy, or difficult, it is to hold a tight tolerance, directly influencing the final cost.
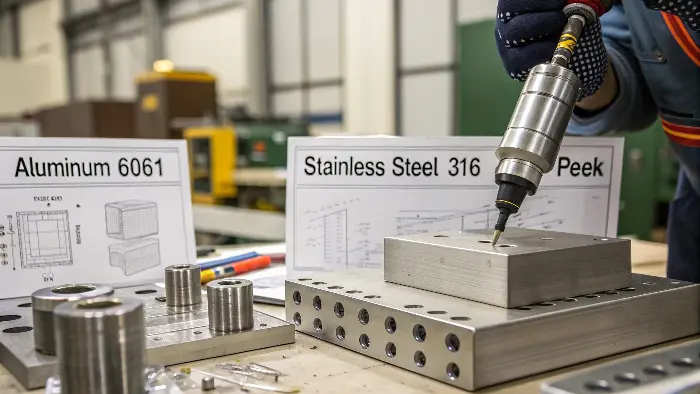
Your choice of material directly affects the achievability and cost of holding tight tolerances. Softer, more stable materials like Aluminum 6061 are easy to machine precisely. Harder or less stable materials like Stainless Steel 316 or plastics like PEEK require special tools, slower speeds, and more careful handling to prevent deformation, making tight tolerances more expensive to achieve.

Choosing a material is always a balance of properties—strength, weight, corrosion resistance, and cost. But another key property that every design engineer must consider is its "machinability." This is a broad term that describes how the material behaves when it’s being cut. A material’s machinability is directly linked to the tolerances you can realistically and cost-effectively hold.
I often get drawings where a designer has specified a hard-to-machine material with very tight tolerances. It’s a combination that instantly raises red flags for cost and lead time. Let’s look at how different materials behave in the shop.
Material Properties and Their Impact on Tolerance
-
Machinability and Hardness: Soft metals like Aluminum 6061 are a machinist’s dream. They cut easily, don’t require a lot of force, and produce a good surface finish with standard tooling. This makes holding tolerances down to ±0.02mm relatively straightforward. In contrast, hard materials like Stainless Steel or Titanium are tough to cut. They generate a lot of heat and cause tools to wear out quickly. We have to run the machines much slower, which increases cycle time and cost.
-
Thermal Stability: All materials expand when they get hot and contract when they cool down. During machining, both the part and the cutting tool heat up. Materials with low thermal expansion, like steel, are more stable. Materials like plastics (especially Delrin or PEEK) and even aluminum can expand significantly. A machinist has to account for this, often using coolant floods and stopping to let the part cool before taking a final "finishing pass." This extra care is needed to ensure the part is the correct size when it’s back at room temperature.
-
Internal Stresses and Warping: Some materials, particularly plastics and metals that have been cold-rolled, have internal stresses. As a machinist cuts away material, these stresses are released, which can cause the part to warp or bow. A flat plate can become a potato chip. To hold a tight flatness tolerance on these materials, we might need to machine one side, then flip it and machine the other side, sometimes repeating this process multiple times. Or, the raw material may need a post-machining heat treatment to relieve stress. Both add significant time and cost.
Here is a quick reference table showing how these factors play out for common materials:
| Material | Machinability | Thermal Stability | Warping Risk | General Advice for Tight Tolerances (±0.02mm) |
|---|---|---|---|---|
| Aluminum 6061 | Excellent | Medium | Low | Very achievable and cost-effective. The go-to material for precise, lightweight parts. |
| Steel 1045 | Good | High | Low | Achievable, but slower and more costly than aluminum due to hardness. |
| SS 304/316 | Fair | High | Medium | Challenging. Work-hardens during cutting. Requires sharp tools and slow speeds. Costly. |
| PEEK | Fair | Low | High | Difficult. Very sensitive to heat. Prone to warping. Requires expert techniques. |
So, when you are in the design phase, think about this relationship. If you don’t need the extreme strength of stainless steel, could you use aluminum and save on machining costs? If you must use a challenging material, be extra critical about which tolerances absolutely need to be tight. This foresight will make you a better designer and a favorite customer at any machine shop.
Conclusion
Ultimately, mastering tolerances is about smart, intentional design. By focusing precision only on critical features, you can drastically cut costs without compromising the quality or function of your product.
