Are you worried about inconsistent quality when outsourcing your CNC machining to China? A single bad batch of parts can derail your entire project, costing you valuable time and money. The right quality assurance strategy is the key to getting perfect parts delivered on schedule, every time.
To guarantee quality, you must thoroughly vet your supplier’s Quality Management System (QMS), provide crystal-clear technical drawings with defined tolerances, and establish a robust inspection protocol. This includes First Article Inspection (FAI), in-process checks, and a final quality control report with measurement data. Clear communication is absolutely essential.

I’ve seen many talented engineers, just like Alex in Germany, struggle with this exact problem. They find a supplier with an attractive price, but the quality control process feels like a complete black box. This creates a lot of uncertainty and risk. But sourcing from China doesn’t have to be a gamble. Let’s break down the exact steps you can take to build a reliable quality assurance process with your manufacturing partner. Following these steps will give you peace of mind and consistently high-quality parts for your projects.
What Should You Look for in a Chinese CNC Supplier’s Quality Management System?
Choosing a supplier based on their website alone is a huge risk. You could easily end up with a partner who talks a good game but cuts corners on quality control when it matters most. Knowing what to look for in their Quality Management System (QMS) separates the professionals from the amateurs.
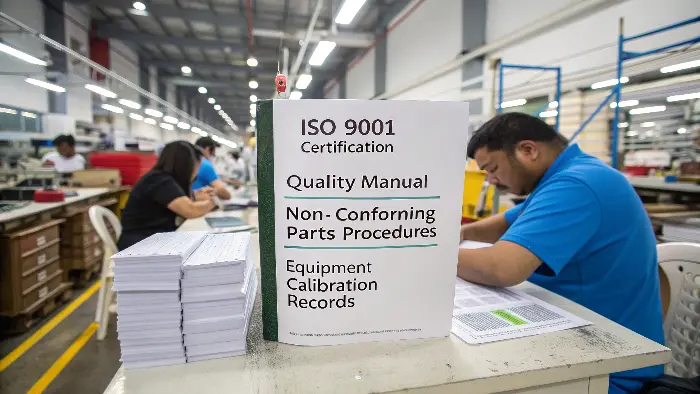
Look for ISO 9001 certification as a baseline, but don’t stop there. A strong supplier will have a documented quality manual, clear procedures for handling non-conforming parts, and records of regular equipment calibration. Ask to see these documents. Their commitment to a robust QMS is a direct indicator of their ability to produce consistent, high-quality parts.

I remember visiting a potential supplier in Dongguan years ago. Their shop floor looked impressive, with rows of modern CNC machines. But when I asked to see the calibration records for their CMM, the manager got nervous. They couldn’t produce them. That was a huge red flag for me. It showed a lack of discipline. A precise machine is useless if your measurement tools are not accurate. This experience taught me to always dig deeper than the surface.
Beyond the ISO 9001 Certificate
An ISO 9001 certificate is a good starting point. It shows that the supplier has a documented system in place. But a certificate on the wall doesn’t guarantee quality on its own. You need to see evidence that they actually follow the system every single day. A great supplier lives and breathes quality, while an average one just does enough to pass the audit. The difference shows in the final parts.
Key Documents to Request
Your due diligence process should involve asking for specific proof of their QMS in action. A transparent and confident supplier will be happy to share these with you. It shows they are proud of their processes.
| Document/Process | Why It’s Important | What to Look For |
|---|---|---|
| Quality Manual | This document outlines their entire quality philosophy and procedures. | Is it a generic template, or is it customized to their specific operations and equipment? |
| Calibration Records | This proves their measurement tools are accurate and reliable. | Check for recent calibration dates for key equipment like calipers, micrometers, and CMMs. |
| Non-Conformance Process | This shows how they identify, document, and handle mistakes. | A good process includes root cause analysis and corrective action plans, not just scrapping the bad part. |
| Material Traceability | This ensures they use the exact material you specified. | Ask how they track raw materials from the moment they arrive to the finished part. They must have material certificates. |
This isn’t about being difficult; it’s about being thorough. For a detail-oriented engineer, this level of verification is crucial for building the trust needed for a long-term partnership.
How Do You Effectively Communicate Your Quality Requirements to Chinese Suppliers?
Have you ever received a batch of parts, only to find they don’t match your design intent? Miscommunication is a primary cause of this, leading to costly rework, frustrating arguments, and serious project delays. A few simple communication strategies can eliminate ambiguity and ensure you get exactly what you specified.
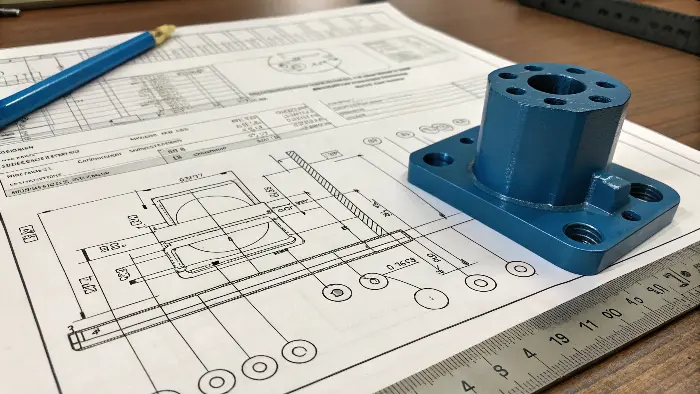
Your 2D engineering drawing is the single most important document. It must be complete and unambiguous. Clearly define all critical dimensions, tolerances, surface finishes, and material specifications. Use standard GD&T symbols. Supplement the drawing with a 3D model, but always state that the 2D drawing is the master document for inspection.

I once worked with a client from Europe who was developing a new robotic gripper. He was a brilliant designer, much like Alex, and sent us a perfect 3D model. However, he didn’t provide a 2D drawing. The first prototype we made was functionally correct, but the surface finish on a gripping surface was too rough for his application. It was a simple misunderstanding that a single note on a drawing—"Ra 1.6 on this surface"—could have prevented. We fixed it immediately, but it taught me a valuable lesson: never assume anything. The drawing is the contract.
The Hierarchy of Information
It’s important to understand the role of each file you send. The 3D CAD model (like STEP or IGS) is primarily used by the programmer to create the toolpaths for the CNC machine. The 2D PDF drawing, however, is for the human beings. The machinist, the quality inspector, and the project manager all rely on the 2D drawing to understand the critical requirements. If there is ever a conflict between the 3D model and the 2D drawing, the drawing must be the final authority.
Essential Elements on Your 2D Drawing
To avoid any confusion, your drawing must be clear and contain all the necessary information.
| Element | Why It’s Critical | Best Practice |
|---|---|---|
| Tolerances | Defines the acceptable range of variation for every dimension. | Specify tolerances for all critical features. Use a general tolerance block (e.g., ISO 2768-m) for non-critical ones. |
| GD&T | Controls the form, orientation, and location of features relative to each other. | Use Geometric Dimensioning and Tolerancing for complex parts to control things like flatness, perpendicularity, and position. |
| Surface Finish | Dictates the final texture of the part’s surfaces. | Use standard symbols (like Ra, Rz) and specify the required value for each functional surface. |
| Material & Hardness | Ensures the part has the correct mechanical and physical properties. | Specify the exact material grade (e.g., AL 6061-T6) and any required heat treatment or hardness (e.g., HRC 45-50). |
| Critical-to-Quality (CTQ) | Highlights the most important features for the part’s function. | Mark these dimensions clearly on the drawing so the machinist and inspector know where to focus their attention. |
Keep all notes on the drawing in simple, clear English. Avoid local slang or overly complex jargon. The goal is universal understanding, not to show off your vocabulary.
What Inspection and Testing Methods Are Crucial for CNC Parts?
You’ve vetted your supplier and sent perfect drawings, but how do you know the parts are being made correctly thousands of miles away? Waiting until the full order arrives at your facility to find a defect is a recipe for disaster. A multi-stage inspection plan provides critical checkpoints to catch any issues early in the process.
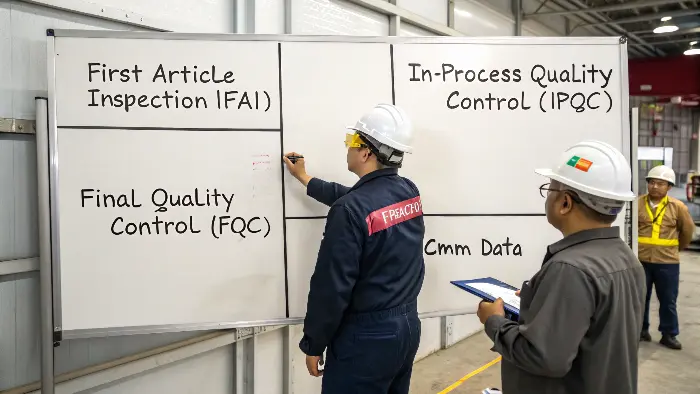
A robust inspection plan includes three key stages. First, a First Article Inspection (FAI) to verify the setup on the first part produced. Second, In-Process Quality Control (IPQC) to monitor consistency during the production run. Finally, a Final Quality Control (FQC) report with CMM data for critical dimensions before the parts ship.

For a complex aluminum housing we made for a robotics client, the FAI was everything. The part had over 50 critical dimensions. Before starting the full production run of 200 pieces, we machined one single part. We then took it to our CMM room and measured every single dimension, hole position, and surface profile specified on the drawing. We compiled this into a detailed FAI report and sent it to the client for approval. He reviewed it and gave us the green light. That single check gave both of us the confidence to proceed, knowing the setup was perfect.
The Power of the First Article Inspection (FAI)
The FAI is arguably the most important quality control step. It’s not just about checking one part; it’s about validating the entire manufacturing process. It confirms that the machine setup, tooling, program, and operator’s understanding are all correct before you commit to mass production. This is your best chance to catch any misinterpretations of the drawing. Always insist on seeing and approving an FAI report before allowing the supplier to run the full quantity.
In-Process vs. Final Inspection
These two inspections serve different purposes. In-Process Quality Control (IPQC) is performed by the machine operator or a floor inspector during the production run. They might check a critical dimension every 10th or 20th part to ensure the process remains stable and hasn’t been affected by tool wear. Final Quality Control (FQC) is a more formal step performed by a dedicated QC inspector after the entire batch is finished. They take a random sample of parts and perform a more thorough check against the drawing.
| Inspection Method | When It’s Used | What It Checks | Key Tools |
|---|---|---|---|
| First Article Inspection (FAI) | On the very first part off the machine. | All dimensions, features, and notes on the drawing. | CMM, Calipers, Micrometers, Height Gauges. |
| In-Process Quality Control (IPQC) | Periodically during the production run. | A few Critical-to-Quality (CTQ) dimensions. | Go/No-Go Gauges, Calipers. |
| Final Quality Control (FQC) | On a sample of finished parts before shipping. | A comprehensive check of key dimensions and overall quality. | CMM, Visual Inspection, Material Testers. |
| Material Certification | Upon arrival of the raw material stock. | Chemical composition and mechanical properties. | Material Certificate from the original mill. |
Don’t just assume these inspections are happening. Ask for the documentation. A transparent supplier will provide the FAI report, the final QC report, and the raw material certificates as part of their standard process. This documentation is your proof of quality.
Conclusion
Guaranteeing quality from China is not about luck; it’s about process. By vetting your supplier’s QMS, providing clear drawings, and demanding a multi-stage inspection plan, you take control. This proactive approach transforms sourcing from a risk into a reliable and powerful strategy for your business’s success.
