Frustrated when your machined parts don’t meet spec? Are tight tolerances causing production headaches and rejects? Understanding common issues is the first step to fixing them.
Common tolerance issues in machined parts often stem from thermal expansion, machine wear, improper workholding, tool degradation, or incorrect machine calibration. Addressing these root causes systematically helps achieve desired precision.
Achieving tight tolerances is a big deal in precision machining. It’s something we focus on every day at QuickCNCs. When parts are out of tolerance, it can cause big problems for engineers like Alex, who relies on accuracy for his robotic components. These issues can delay projects and increase costs. Let’s look at some common reasons why tolerances go off and how we can troubleshoot them. These insights come from my years in the workshop and helping clients worldwide.
How Can Thermal Expansion Affect Machining Tolerances?
Parts not fitting after cooling down? Are dimensions changing unexpectedly between machining and inspection? Thermal effects might be the hidden culprit impacting your precision.
Thermal expansion causes materials to change size with temperature variations. If not managed, this can lead to parts being machined to incorrect dimensions when they return to ambient temperature.
Temperature changes are a constant challenge in machining. I’ve seen this many times. A workshop can heat up during the day, or a machine itself can generate a lot of heat. Materials like aluminum expand more than steel with the same temperature rise. When we machine a part, especially during long cycles or heavy cutting, both the workpiece and the machine components can heat up. If the part is measured while it’s still warm, it might seem correct. But once it cools down to room temperature, it will shrink, and suddenly it’s out of tolerance. This is particularly critical for engineers like Alex who need ±0.01mm precision.
To manage this, we often use coolant. Coolant does two things: it lubricates the cutting process, and it helps carry away heat.
Here’s how we address thermal expansion:
- Temperature Control: We try to keep the workshop temperature stable. Some high-precision shops have climate control.
- Coolant Application: Using the right coolant and applying it effectively is key. Flooding the cutting zone helps maintain a more consistent temperature.
- Allowing for Stabilization: For very critical parts, we might let the material stabilize to the workshop temperature before final machining passes. Sometimes, we even machine in stages, letting the part cool between operations.
- Machine Compensation: Modern CNC machines sometimes have thermal compensation systems that adjust for the machine’s own temperature changes.
Understanding the thermal properties of the material you’re machining is essential. It’s a conversation I often have with clients to ensure we account for these effects right from the quoting stage for their CNC parts.What Happens When Machine Components Wear Out or Loosen?
Seeing unexpected inaccuracies in your parts? Are finishes getting worse or dimensions drifting over time? Worn or loose machine components could be slowly ruining your precision.
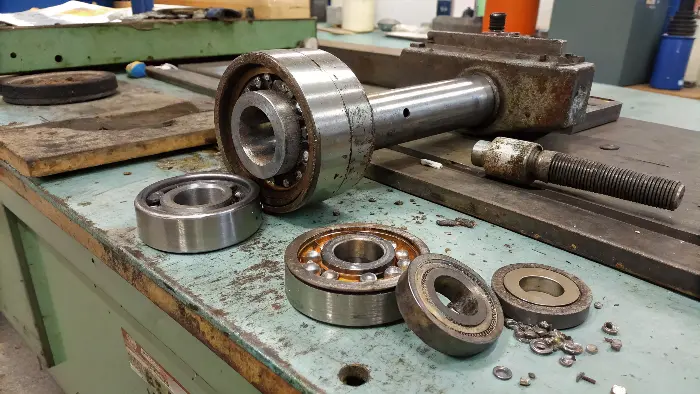
Worn or loose machine components like bearings, guideways, or ballscrews introduce play and vibration. This directly reduces the machine’s ability to hold tight tolerances, leading to inconsistent part quality.

A CNC machine is a complex piece of equipment with many moving parts. Over time, these parts wear out. Think about the spindle bearings that allow the tool to rotate at high speeds, or the ballscrews and linear guides that move the machine axes. When these components develop wear or become loose, the machine loses its rigidity and accuracy. This is a bit like trying to write with a pen that has a wobbly tip. You won’t get a clean, precise line.
I remember a case where a client was getting inconsistent hole diameters. We traced it back to worn spindle bearings on their older machine. The wear introduced a slight wobble, making the holes slightly oversized or out of round. For someone like Alex, whose robotic parts need perfect bores for shafts and bearings, this would be a major issue.
Here are some common signs and solutions: - Increased Noise or Vibration: If the machine starts making unusual noises or vibrating more than usual, it’s a warning sign.
- Poor Surface Finish: Worn components can lead to chatter marks on the part surface.
- Inconsistent Dimensions: Parts from the same batch might have varying dimensions.
- Backlash: This is play in the movement of an axis, often due to worn ballscrews or nuts.
Regular machine maintenance is crucial. This includes checking for wear, lubricating components, and replacing parts before they fail completely. At QuickCNCs, we emphasize the importance of well-maintained machines to our partner factories. It’s fundamental to delivering the precision our clients expect for their custom metal and plastic parts.Why is Proper Workpiece Clamping So Critical for Tolerances?
Parts shifting during machining? Finding dimensional errors that seem random? Improper workpiece clamping could be the simple, yet critical, issue affecting your machining accuracy.
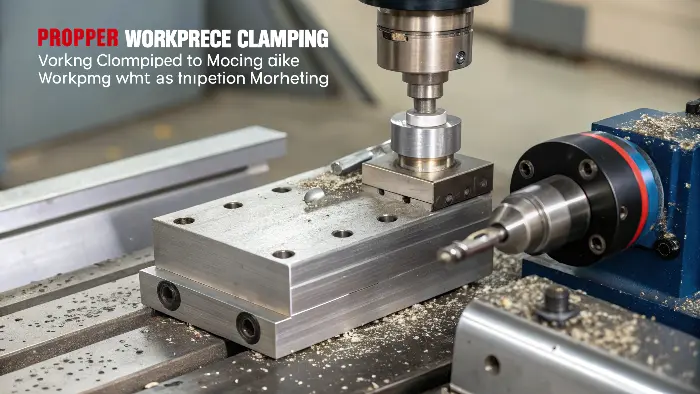
Proper workpiece clamping ensures the part remains rigid and doesn’t move or vibrate during machining. Incorrect clamping can lead to deformation, movement, or vibration, directly causing tolerance failures.

How you hold the workpiece in the machine is incredibly important. If the part isn’t held securely, it can move slightly during cutting. Even a tiny movement, almost invisible to the eye, can throw tolerances way off. This is especially true when machining with aggressive cutting forces or when working with thin-walled parts that can easily deflect.
I’ve seen situations where a part was clamped too tightly, causing it to deform. Then, when it was unclamped after machining, it sprang back, and the dimensions were wrong. On the other hand, if it’s clamped too loosely, it can vibrate or even shift. Imagine Alex designing a delicate housing; if it’s crushed by the clamp, or moves, the intricate features will be compromised.
Key considerations for good workholding include: - Rigidity: The fixture and clamping method must be strong enough to resist cutting forces.
- Avoiding Distortion: Clamping pressure should be applied evenly and in a way that doesn’t bend or distort the part. For delicate parts, custom fixtures are often needed.
- Accessibility: The clamps shouldn’t interfere with the cutting tool’s path.
- Repeatability: For production runs, the clamping method must allow for consistent positioning of each part.
We often design custom fixtures at QuickCNCs for complex parts or high-volume production. This ensures each piece is held in exactly the same way, which is essential for maintaining tight tolerances across a batch. It’s an upfront investment that pays off in quality and consistency, particularly when sourcing CNC parts from China where skilled fixture design is a valuable asset.How Does Tool Wear or Damage Impact Machined Part Accuracy?
Noticing a gradual decline in part quality? Are surface finishes rougher or dimensions slowly drifting out of spec? Your cutting tools might be wearing out or damaged.
As cutting tools wear, their cutting edges dull or chip. This increases cutting forces, can cause workpiece deflection, generate more heat, and directly result in out-of-tolerance dimensions and poor surface finish.

Cutting tools don’t last forever. As they cut material, the sharp edges gradually wear down. This wear isn’t always obvious at first glance. A slightly dulled tool might still cut, but it won’t cut as cleanly or accurately. It tends to push the material more than shear it. This increased force can cause the workpiece to deflect slightly, especially if it’s not super rigid. It also generates more heat, which brings us back to thermal expansion issues.
If a tool chips, even a tiny chip, it can leave marks on the surface or cause the dimension to be off. For Alex’s high-tolerance parts, a worn or chipped tool is a definite no-go. The ±0.01mm he needs can easily be lost due to a compromised cutting edge.
Monitoring and managing tool life is critical: - Regular Inspection: Tools should be inspected regularly for wear or damage, sometimes using a microscope.
- Tool Life Management Systems: Many modern CNC machines have systems that track how long a tool has been used and alert the operator when it’s due for a change.
- Using the Right Tool for the Job: Choosing the correct tool material, geometry, and coatings for the specific workpiece material and operation significantly impacts tool life and part quality.
- Optimal Cutting Parameters: Running tools at the correct speeds and feeds also helps prolong their life and ensures they cut efficiently.
At QuickCNCs, we always stress the importance of using high-quality, sharp tooling. It’s a fundamental part of precision machining. Saving a little money on cheaper tools or trying to stretch tool life too far often costs much more in scrapped parts and lost time. This is a key point when discussing manufacturing insights with our clients.Could Incorrect Machine Calibration or Setup Be Your Tolerance Problem?
Are your parts consistently off, even with new tools and secure clamping? Wondering if a deeper machine issue is at play? Incorrect machine calibration or setup might be the root cause.
Incorrect machine calibration means the machine’s actual movements don’t match its programmed commands. Setup errors, like wrong tool offsets or work offsets, also lead directly to dimensional inaccuracies in parts.

Even the best CNC machine needs to be properly calibrated and set up to produce accurate parts. Calibration ensures that when the controller tells an axis to move 10.000 mm, it actually moves 10.000 mm. Over time, due to wear or sometimes after a crash, a machine’s calibration can drift. This isn’t always a dramatic failure; it can be a very subtle, cumulative error.
Then there’s the setup for each specific job. This involves things like: - Tool Offsets: Telling the machine the exact length and diameter of each cutting tool. If this is wrong, holes will be the wrong depth, or features will be the wrong size.
- Work Offsets (Fixture Offsets): Telling the machine where the workpiece is located on the machine table. If this "zero point" is incorrectly set, all machined features will be misplaced.
- Program Errors: Sometimes, the G-code program itself might have an error that causes the machine to cut in the wrong place or to the wrong depth.
I’ve seen cases where operators, especially less experienced ones, make small mistakes in setting offsets. These small mistakes can lead to big tolerance problems. For Alex’s complex robotic parts, which often have many features referenced from different datums, correct setup is paramount. A mistake in one offset can cascade through the entire part. Regular calibration by qualified technicians and meticulous setup procedures are essential. We use probing systems to help automate and verify setups, which reduces the chance of human error. This is part of how we ensure consistent quality for our global clients, providing reliable CNC machining services.Conclusion
Troubleshooting tolerance issues requires a systematic approach. By understanding these common causes – from thermal effects to machine setup – you can achieve the precision your designs demand.
